If you have ever heard people asking each other the very unfavourable question: Does cavity wall insulation cause damp? You’re not alone. It’s a common question from homeowners, and one that’s often met with confusion.
Cavity wall insulation is designed to improve energy efficiency, reduce heat loss, and keep homes warm without costing you higher energy bills. But can it cause damp issues?
The short answer is “No,” cavity wall insulation itself does not cause damp.
But if your operator has done improper installation or used the wrong material, then it can certainly contribute to the damp issues, especially when it’s not done properly while keeping ventilation in mind.
As someone who has worked in the energy efficiency and insulation industry for years, I’ve seen firsthand how cavity wall insulation can lead to damp problems if the installation isn’t handled properly.
Let’s talk about this issue in detail.
What Causes Damp In Homes?
Before we get into the details of “Does cavity wall insulation cause damp?”. It’s important to understand what possible reasons can cause dampness in your home to address the rot cause effectively.
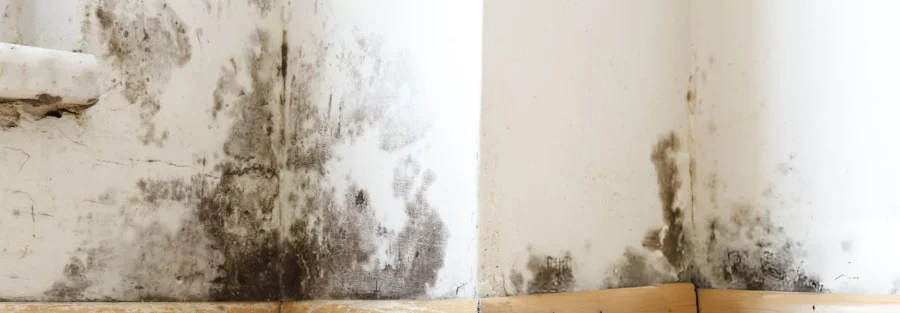
Damp generally refers to moisture that has found its way into your home, often leading to issues like mould, rotten timbers, and even structural damage.
It’s a problem that affects many properties, particularly older homes, and can be a silent destroyer of both your home and health. Here’s what typically causes damp:
1 – Moisture Ingress
Moisture ingress happens when water enters the home from the outside.
A person can encounter moisture ingress due to the poor maintenance of the exterior walls, roof leaks, cracked masonry, and blocked gutters.
If water from wind-driven rain is allowed to enter the exterior walls, it can easily travel through the structure and cause dampness.
2 – Condensation
Condensation occurs when warm, moist air comes into contact with cold surfaces (e.g., walls, windows).
In homes that are poorly ventilated, the air can become saturated with moisture, especially in areas like bathrooms and kitchens.
Without proper airflow, this moisture settles on walls and becomes damp, causing problems like mould growth and a musty smell.
3 – Rising Damp
Rising damp is a well-known issue, especially in older properties. During the time of inspection, almost every 2nd home that was built in the late 90s has rising damp issues, where the moisture rises through the walls and reaches the stage where it becomes prominent.
Surprisingly, this can happen with new properties too, but only when a property doesn’t have a damp proof course (DPC), allowing moisture to penetrate the outer walls.
4 – Penetrating Damp
Similar to moisture ingress, penetrating damp occurs when water is able to pass through the walls because of faulty roofing.
This can also happen due to cracks in masonry or poorly sealed external walls. It typically affects the external walls or roof, allowing water to penetrate the structure and cause dampness.
5 – Poor Ventilation
Without proper ventilation, moisture in the air has nowhere to escape, increasing humidity levels in the home.
This moisture is then absorbed by the walls, furniture, and other surfaces, leading to damp problems.
Having a better understanding of these issues is important when considering cavity wall insulation. Insulation, by itself, does not cause damp.
But, if there’s already a problem with moisture ingress, poor ventilation, or rising damp, then insulation can trap the moisture within the walls
How Poor Installation Of Cavity Wall Insulation Can Lead To Damp
One of the most common reasons for damp in homes with cavity wall insulation is poor installation.
While insulation itself is designed to improve energy efficiency, when not installed correctly, it can exacerbate existing moisture issues or even create new ones.
Let me walk you through the most common installation mistakes that can lead to damp:
1 – Incorrect Insulation Material
Not all insulation materials are created equal. Some materials are better suited for certain types of properties or climates, while others may actually trap moisture inside the cavity walls.
For example, foam insulation and polystyrene beads are popular choices, but if they are not installed properly, they can absorb moisture and act as a bridge for it to travel from the outer wall to the inner wall. This leads to damp spots inside your home
How Does It Happen?
When water enters the exterior walls of your home via rain, condensation, or rising damp, materials like foam or polystyrene beads can hold onto that moisture.
The water that gets trapped in the insulation will have nowhere to go, leading to damp caused by cavity wall insulation.
Solution
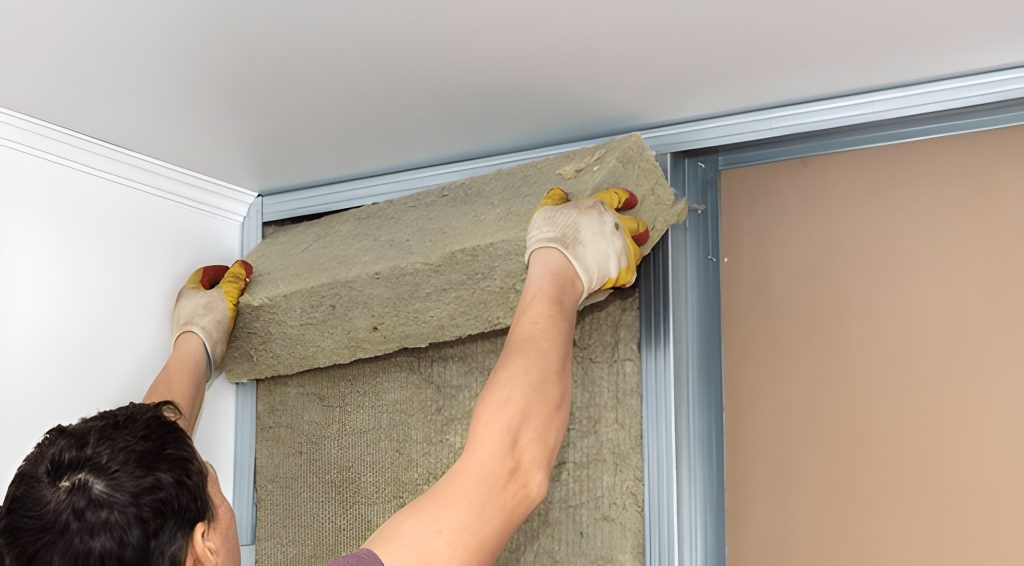
Always use moisture-resistant insulation materials such as mineral wool or polyurethane for areas prone to damp.
These materials are less likely to absorb water and will allow the cavity to breathe properly, preventing moisture buildup inside the walls.
2 – Poor Airflow And Ventilation
One of the most critical factors to prevent damp is to have proper ventilation. Without it, moisture from everyday chores like cooking, showering, and even breathing can build up inside the home.
Cavity wall insulation works by filling the gap between the internal and external walls to stop heat from escaping, but if proper ventilation isn’t maintained, it can trap moisture inside.
How Does It Happen?
When there’s improper airflow, moisture gets stuck between the insulation and the exterior walls.
Because of this, the trapped moisture condenses on the wall, which leads to damp spots and mould growth.
You may notice that some rooms in your home may feel damp or chilly even with the heating on, which clearly indicates that the insulation is acting like a moisture sponge, trapping both warmth and damp.
Solution
When your operator comes to install the cavity wall insulation or replace it, make sure that your home has sufficient air bricks, ventilation ducts, and trickle vents to maintain airflow.
If you’re unsure, have a professional survey your property for the best placement of ventilation solutions to complement the insulation.
3 – Blocked Air Vents And Gaps In Insulation
Do you know why focusing on the details matters in such a scenario? Because the entire installation could fail if the installer overlooks a small detail.
This may not only cost you resources but also a significant amount of time to replace and fix. And it can be a hefty price if you are not getting it done through the government grants and scheme program.
For example, when our team from Ever ECO visits for a survey, we always check whether the ventilation openings (air bricks) are open or blocked.
If the installer fills these vents with insulation material by mistake, the airflow is blocked, and then moisture builds up inside the cavity, causing dampness
How Does It Happen?
Blocked air vents or improperly sealed areas in the cavity wall can result in poor airflow, especially when insulation material is improperly inserted or packed too tightly.
This prevents moist air from escaping and increases the risk of damp. In cases where insulation is unevenly distributed or leaves gaps, it can create pockets of stagnant, moist air that promote mould growth
Solution
Always make sure that air vents are not blocked or restricted, and the insulation material that your installer has filled includes the gap for natural airflow through the cavity.
A professional installer will always know about this information and won’t cause rookie mistakes like that.
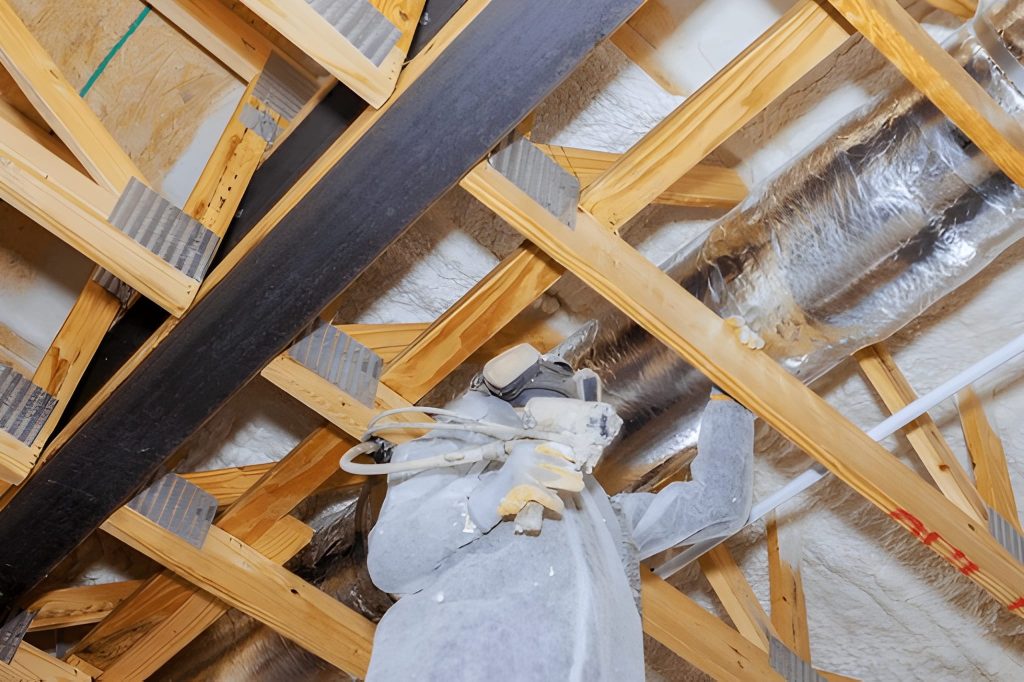
4 – Incorrect Wall Preparation
Before cavity wall insulation is installed, the exterior walls need to be prepared properly. If there are cracks or gaps in the outer wall, moisture can easily seep into the cavity and impact on the insulation.
And that’s just the tip of the iceberg. If the wall isn’t properly sealed or treated for damp before installation, it could make the problem even worse.
How Does It Happen?
When insulation is installed without sealing or damp-proofing the outer walls, water can penetrate and cause dampness.
Secondly, wind-driven rain can be pushed through the cracked walls, reaching the cavity and the insulation. Once the water touches the inside surface, it causes dampness and results in long-term structural damage.
Solution
Prior to installing cavity wall insulation, ensure that all cracks and damage on the external walls are repaired and sealed with appropriate weatherproofing.
Consider adding a damp-proof course if the external walls are susceptible to moisture penetration.
How To Prevent Damp When Installing Cavity Wall Insulation
Installing cavity wall insulation correctly is crucial for ensuring your home remains dry, comfortable, and energy-efficient.
If done properly, it can significantly reduce your energy bills and improve your home’s overall energy performance.
However, poor installation can lead to damp problems, so it’s important to take the necessary steps to prevent any potential issues.
Here’s how you can prevent damp when installing cavity wall insulation:
1 – Hire A Certified Professional Installer
One of the most important things to make sure that your cavity wall insulation is installed properly is to hire a certified installer.
A professional installer will always have the right knowledge and experience to get the job done. From choosing the right insulation material to preparing your home properly, and telling you the after-care details, an expert will guide you throughout the process.
When you choose a certified installer, you’re not only ensuring a correct installation, but you’re also making sure that the work complies with the standards set by regulatory bodies.
Look for installers who are members of recognized organizations like TrustMark or NSAI. These certifications guarantee that the installer is qualified and follows industry best practices.
| Tip For Homeowners: You can always ask your installer this question: “Does Cavity Wall Insulation Cause Damp?” And if they answer it right, like we explained in this article, then you’re good to go. This way you can check if the installer who is working on your property holds the right knowledge, even with the certification, because a certificate may lie, but not the experience and knowledge. |
2. Ensure Proper Ventilation
Proper ventilation is essential for preventing damp problems after installing cavity wall insulation. Without adequate airflow, moisture from daily activities such as cooking, showering, and even breathing can accumulate in your home.
This trapped moisture can settle on the walls, causing condensation, which in turn can lead to damp and mould growth.
During installation, make sure the installer leaves sufficient gaps for airflow. This includes ensuring that air vents aren’t blocked and that trickle vents or air bricks are properly installed to allow air to flow freely through the walls.
If your home has existing ventilation issues, address these before installing cavity wall insulation to reduce the risk of trapped moisture.
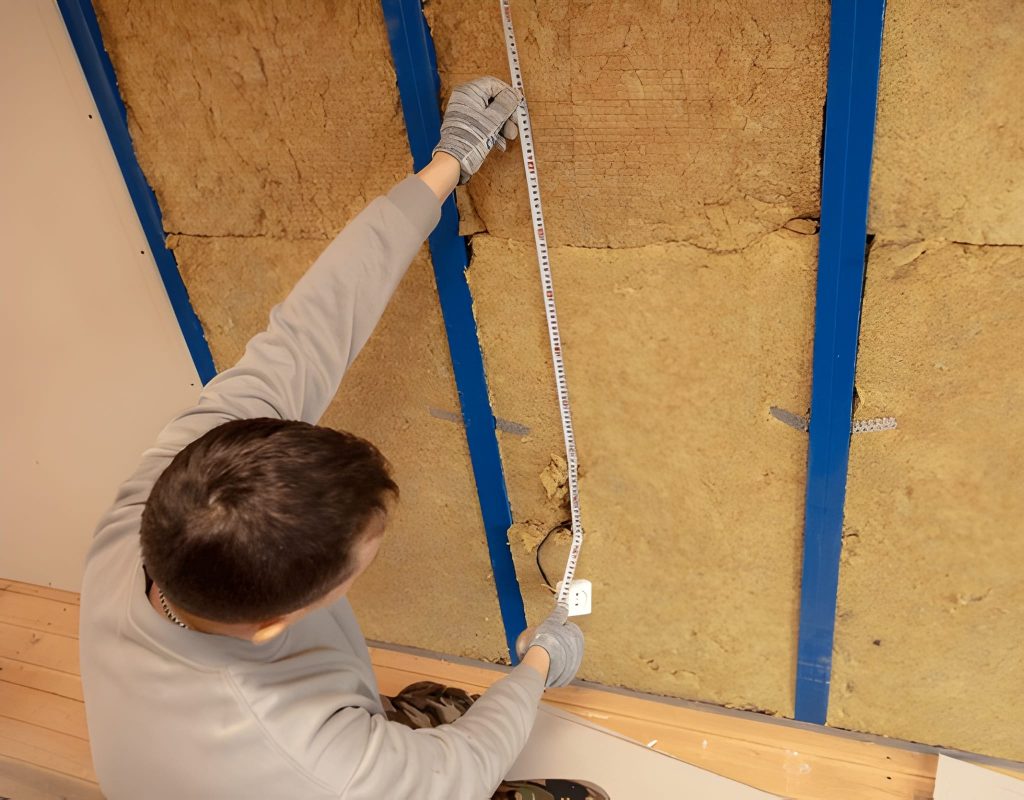
3 – Choosing The Right Insulation Material
Not all insulation materials are a suitable fit for every home. Foam insulation or polystyrene beads are the most common insulation type used in the UK. These two materials are more vulnerable to moisture and dampness issues if exposed to water or humidity.
To minimize the risk of moisture retention, choose insulation materials that are moisture-resistant.
For example, mineral wool is less likely to absorb moisture and allow the cavity wall to breathe properly. This reduces the chances of condensation or dampness.
But here’s the tricky part, the choice of the insulation material depends on your property type, climate, and the current condition of your external wall.
4 – Seal Exterior And Repair Damage
Before you plan to install cavity wall insulation, make sure you know everything about the current situation of your external wall, like cracks and gaps.
If overlooked, it can result in moisture ingress, which can impact the insulation, making it less effective and causing damp problems.
Ensure that any cracks or damage in the outer wall are sealed properly before the insulation is installed.
This includes checking the condition of the roof, windows, and gutter system to ensure that water doesn’t enter the walls. If your home has a damp-proof course (DPC), verify that it is intact and effective.
By fixing these external issues before installation, you’re preventing water from entering the cavity and trapping moisture inside the walls, which is one of the primary causes of damp caused by cavity wall insulation.
5 – Consider Moisture Barriers For High-Risk Areas
In homes that are prone to humidity or located in high rainfall areas, it would be best to add a moisture barrier during the installation as an add-on. These barriers act as a shield and protect the insulation material from the moisture.
With that said, if your home is vulnerable to wind-driven rain or rising damp, use a damp-proof membrane (DPM) to protect the insulation from moisture.
This extra step may not look like a big deal, but it surely makes a big difference, especially when your installer recommends that you do it.
6 – Regular Maintenance And Monitoring
Regular maintenance and monitoring are something we often overlook because of a tough schedule and working routine. And honestly, no one has the time to regularly check their walls for insulation-related issues.
But once your cavity wall insulation is installed, we recommend everyone keep a proper routine of maintenance so the insulation remains intact and effective.
During your inspection, if you point out the signs of damage, like cracks, mould, or damp patches, address those issues immediately. Check the ventilation system to make sure it’s working properly and the vents are not blocked or obstructed.
Signs Of Damp Caused By Cavity Wall Insulation
If you are confused whether your cavity wall insulation is causing damp, here are some signs that you need to consider for making an informed decision:
1 – Cold And Damp Spots On Internal Walls
If you’ve noticed certain areas of your walls feel colder or damp to the touch, this could be a sign that moisture is being trapped in the insulation.
When moisture gets into the cavity and becomes trapped by insulation that isn’t installed correctly, it can create cold spots where condensation forms. These spots can eventually lead to black mold or rot in severe cases.
| Personal Experience: I’ve encountered situations where cold spots in the living room walls indicated that moisture was trapped inside the insulation. Despite the home being heated, certain areas still felt cold, indicating that the cavity wall insulation was not allowing for proper airflow, causing the moisture to condense. |
2 – Musty Smell Or Mould Growth
A musty smell is the most disgusting sign of damp in any home. Plus, if you found black mold around the windows, corners, and walls, then it’s a clear indication that your walls are building up moisture inside.
Mould thrives in moist, poorly ventilated environments, conditions that are often exacerbated by cavity wall insulation that traps moisture and doesn’t allow the walls to breathe.
| Real Case Scenario: The team at Ever ECO Energy Solutions once worked with a family whose home had a persistent musty smell despite regular cleaning. After checking their cavity wall insulation, it was clear that moisture was trapped inside, causing mould growth. Once the insulation was replaced with the correct moisture-resistant material, the musty smell disappeared, and the mould was eradicated. |
3 – Visible Damp Patches On The Wall
Damp patches will start appearing on your internal walls that are located near the exterior walls. This mostly happens when the moisture from the outside enters the cavity and gets stuck in the insulation material.
Over time, that insulation material starts showing leakage into the interior walls and creates damp patches.
If you notice these patches on the floor or exterior walls, it’s a strong sign that your cavity wall insulation has lost its resistance to keep the moisture out.
4 – Sudden Increase In The Heating Bills
Last but not least, another indirect sign of cavity wall damp problem is a noticeable increase in the energy bills, specifically the heating bill. Poorly installed insulation filled with moisture makes the insulation performance less efficient.
You may feel your home is cold even with the heating system on because the insulation is no longer doing its job as a thermal barrier, which results in higher energy bills.
Frequently Asked Questions
1. What are the downsides of cavity wall insulation?
The main downsides of cavity wall insulation are poor installation, wrong material choice, and trapped moisture, which can lead to damp and mould growth if not done correctly.
2. What cavity wall insulation doesn’t cause dampness?
Mineral wool and polyurethane are moisture-resistant options that are less likely to absorb water, helping prevent dampness when installed correctly with proper ventilation.
3. Can too much insulation cause damp?
Yes, if cavity wall insulation is too thick or improperly installed, it can block airflow and trap moisture inside, potentially leading to condensation and damp problems.
4. What are the disadvantages of wall insulation?
The disadvantages of wall insulation include potential moisture trapping if not installed properly, improper material choice, and the need for adequate ventilation to prevent damp issues.
Final Words
Cavity wall insulation is an excellent way to improve energy efficiency and reduce heating bills, but like any other home improvement, it needs to be done correctly.
By choosing the right insulation material, making proper ventilation, and hiring a qualified professional to handle the installation, you can enjoy the peace of mind that comes from cavity wall insulation.
But if you are experiencing damp problems, take action now, reach out to a professional insulation expert, and get the job done.